In order to fully take advantage of all of the features indicated in the help docs, you must have the Pro version of TabSesh, either by subscription or one-time purchase option.
Enabling TabSesh in Safari
Because Safari extensions require user authorization before they can run, you must enable TabSesh once after downloading it from the App Store.
On macOS
- Open Safari.
- In the menu bar at the top, select Safari > Settings… (or press
⌘ ,). - Click the Extensions tab at the top of the window.
- Locate TabSesh Tab Manager in the sidebar list and check the box next to it to enable it.
- In the permissions dialog or on the right panel, ensure permissions are granted for websites so TabSesh can read and restore open tab URLs.
- (Optional) Click the extension puzzle piece icon in the Safari toolbar and pin the TabSesh icon for one-click access.
Getting Started with TabSesh Browser Extension
This guide walks you through activating TabSesh in Safari on macOS, plus how to start saving and managing your sessions right away.
Two Window Modes
1. Popup Window Mode
Popup window is the smaller window that opens when the user clicks on the extension icon in the browser toolbar. This mode provides quick access to all your currently open tabs, as well as all saved sessions. You can quickly search and find an open tab or a saved tab within your saved sessions. The popup window may be small, but it has nearly all of the features available within Full-page Workspace Mode.
2. Full-Page Workspace Mode
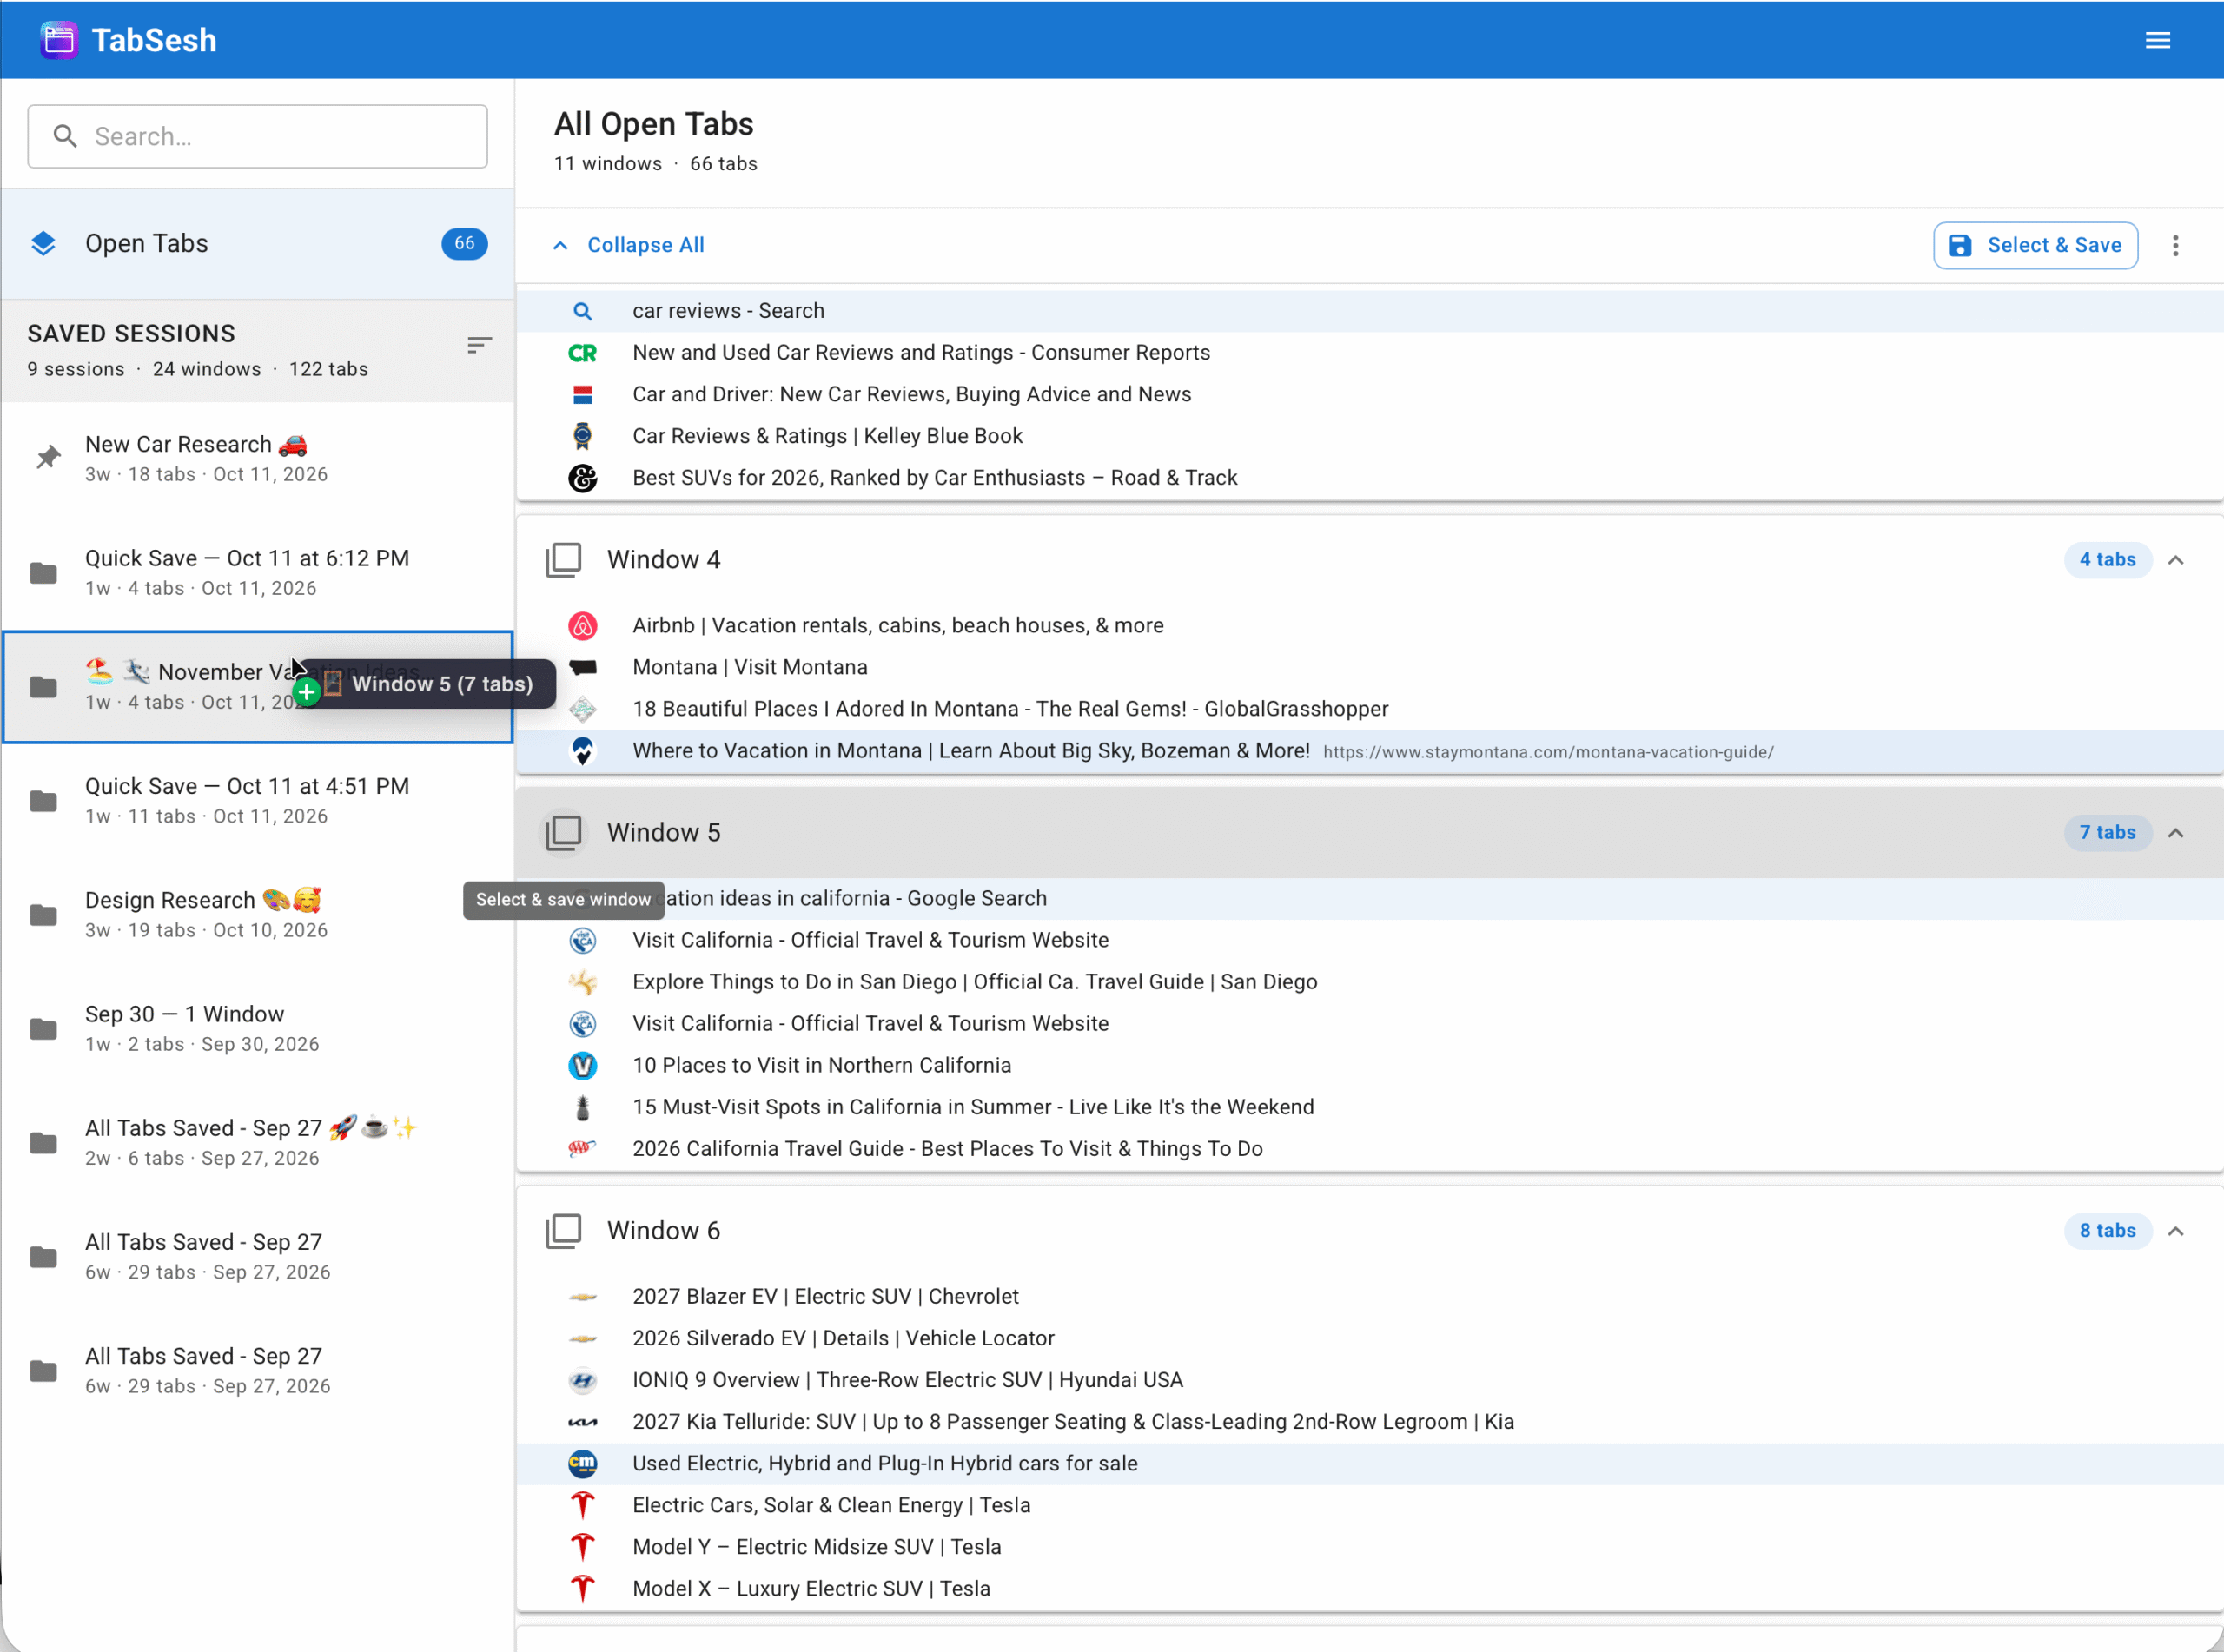
Need more room? Click the Full Page pop-out icon (⤢) in the header to open TabSesh in a full dedicated browser tab. In full-page view, you can more easily interact with all of the features of TabSesh, view card details, manage window sets, and drag-and-drop between sessions with ease.

Quick Tour: How to Use TabSesh
🗂️ Saving Open Tabs
Saving your open tabs into personalized saved sessions is at the core of TabSesh. This allows you to organize and save your tabs into topics or groups that matter to you. Once you’ve saved tabs into a saved session, it frees you up to close those open tabs so you can focus. Later you can open up the tabs & windows in any of your saved sessions when your ready to get back to those topics or interests!
- Save Everything: Click Save All Tabs from the Open Tabs more options menu (
⋮) to bundle every currently open window and tab into a timestamped saved session. - Select & Save: Switch to selection mode by clicking Select to choose only the specific windows you want to save. You can:
- Create a New Session
- Add to an existing saved session
- Replace an existing session with the selected open windows (with built-in safety confirmation so you don’t accidentally overwrite saved windows/tabs)
- Drag and Drop: In Full View Mode, you can easily drag any open window directly into an existing saved session from the Open Tabs list of windows to the Saved Sessions listed in the right side bar.
📂 Manage Sessions
The manage session features allows you to further organize or modify the windows and tabs within your existing saved sessions. As your browsing sessions evolve, you might want to reorganize, split, or combine windows across your saved sessions without having to re-open and re-save them.
TabSesh’s Manage Session mode provides powerful, non-destructive tools to organize and refine your saved window groups.
Entering Manage Mode
- Go to the Saved Sessions tab (or open TabSesh in Full Page view).
- Click the More options (
⋮) menu on any saved session card. - Select Manage Session.
- Checkboxes will appear beside each window group in that session. Select one or more windows to unlock the bottom action toolbar.
What You Can Do in Manage Mode
Once you’ve selected your window groups, choose from the actions in the bottom toolbar:
1. 🗂️ New Session
Extract the selected windows into their own standalone saved session.
- Ideal for splitting large multi-project sessions into separate, dedicated sessions.
- If you move all windows out of the original session, TabSesh will ask if you’d like to delete or keep the empty session shell.
2. 🔀 Merge Windows (New)
Combine two or more selected window groups into a single unified window.
- When you click Merge, a dialog lets you choose a name for your combined window (choose from an existing window’s name or type a custom one).
- Includes a handy “Remove duplicate tabs when merging” option to keep your combined window clean and deduplicated.
- The combined window replaces the originals in-place, keeping your session neat and organized.
3. 📦 Move
Transfer the selected window groups directly into another existing saved session.
- A dialog will prompt you to pick your destination session.
- The selected windows are removed from the current session and appended to the target session.
4. 📋 Copy
Duplicate the selected window groups into another saved session.
- Leaves your current session completely untouched while creating an exact copy in your chosen destination session.
5. 🗑️ Delete Windows
Permanently remove only the selected window groups from the session without deleting the entire session.
- A double-check confirmation dialog ensures you never accidentally delete windows.
Exiting Manage Mode
To cancel your selection and exit Manage mode at any time, simply click Cancel in the bottom toolbar or press Esc.
🔄 Restoring Tabs & Windows
- One-Click Restore: Open TabSesh, go to Saved Sessions, and click the restore icon (
↻) on any session to re-open all of its windows and tabs exactly as you left them. - Window-by-Window: Expand a saved session and restore individual window groups without cluttering your desktop.
📌 Organizing Your Sessions
- Pin Favorites: Pin your daily work environments, research topics, or reading lists to the top of the list so they never get lost.
- Sort Your Way: Sort sessions by date (newest/oldest) or alphabetically by title.
- Search Instantly: Use the search bar to filter open tabs or find specific saved links across your library in real time.
Customizing Color Modes & Themes
For Pro users, TabSesh offers multiple visual themes to personalize your workspace, match your operating system, or reduce eye strain.
How to Change Your Color Mode (Pro)
- Open the TabSesh popup.
- Click the More Options menu (⋮) in the top-right corner of the header.
- Hover over or click Appearance ▸.
- Select your preferred color mode from the list. Your choice is saved automatically and remembered across browser sessions.
Available Color Modes
| Mode | Availability | Description |
|---|---|---|
| Light | Free & Pro | A clean, bright interface with crisp typography and classic blue accents. Ideal for daytime use and high-contrast readability. |
| Dark | 🔒 Pro | A deep, modern dark theme designed to minimize glare and conserve battery life in low-light environments. |
| Winter | 🔒 Pro | A cool, calming Nordic-inspired palette featuring deep navy backgrounds & visual accents. |
| Purply | 🔒 Pro | A stylish, vibrant dark theme with deep purple-slate backgrounds, rich card surfaces, and a signature gradient purple navigation bar. |
| System Default | 🔒 Pro | Automatically mirrors your Mac or iOS system appearance, seamlessly transitioning between Light and Dark modes according to your OS schedule. |
Essential Keyboard Shortcuts (macOS)
Accelerate your workflow with TabSesh’s built-in keyboard shortcuts. Global keyboard shortcuts are user configurable in Safari Extension settings.
| Shortcut | Action |
|---|---|
| ⌘ ⇧ Z | Open the TabSesh popup window (Global) |
| ⌘ ⇧ P | Open TabSesh in full-page workspace view (Global) |
| ⌘ ⇧ S | Quick save all open tabs in current window (Global) |
| ⌘ S | Save all open tabs |
| ⌘ F or / | Jump to and focus the search bar |
| ⌘ E | Toggle expand / collapse for all windows |
| ⌃ P | Pin / unpin active or selected session |
| ⌘ ⇧ D | Delete selected / active saved session |
| Esc | Clear search / cancel mode / close dialog |
| ⌘ ? | Open the in-app Keyboard Shortcuts cheat sheet |